- /
- /
- /
Configuring a CNAME record for Virtual Booth KB19072
In order to use the Virtual Booth feature on your Booth Print PRO, you must configure the DNS records of your domain to allow users to access it.
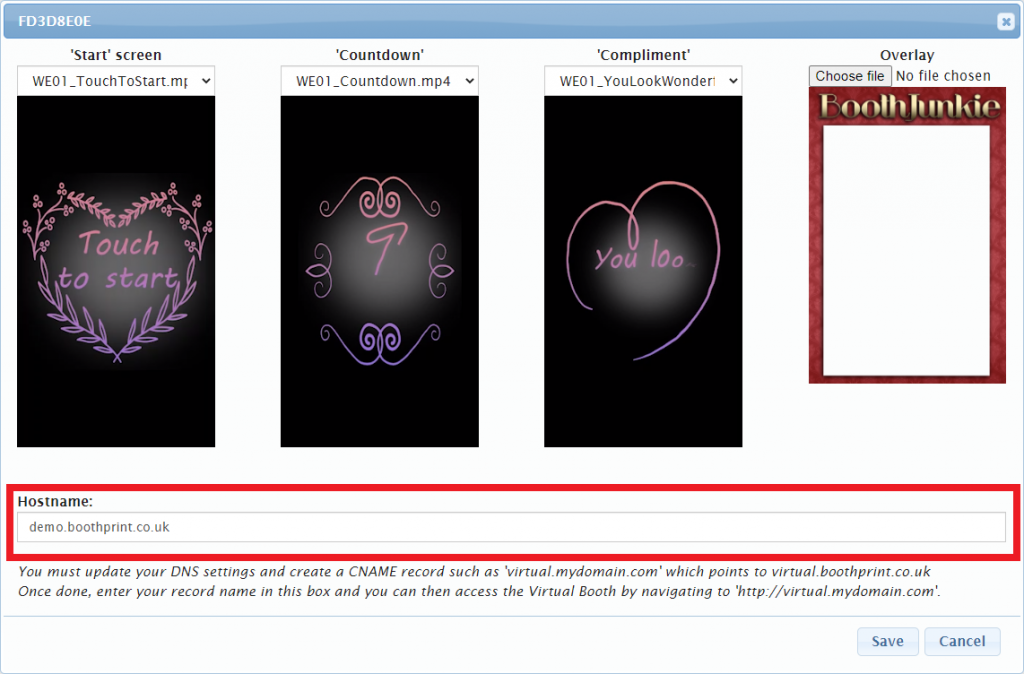
You must update your DNS settings and create a CNAME record such as ‘virtual.mydomain.com’ which points to virtual.boothprint.co.uk
Once done, please enter your chosen CNAME (eg: virtual.mydomain.com) into the Hostname box, found by clicking on the ‘Configure’ button for the Booth Print PRO found in your dashboard.

Users will then be able to access the Virtual Booth by navigating to your chosen domain (eg: ‘http://virtual.mydomain.com’).
If you are unsure how to manage your DNS settings, or how to add a CNAME record to your domain, we have listed below some of the most common domain registrars for you as well as a link to their individual instructions.
Alternatively, please contact your web developer, web host, or domain registrar, who should be able to assist you.
- 123-Reg
Step 6 – enter virtual in the HOST box to use virtual.mydomain.com (or your chosen alternative)
Step 7 – enter virtual.boothprint.co.uk - GoDaddy
Step 6 – enter virtual in the HOST box to use virtual.mydomain.com (or your chosen alternative)
Step 6 – enter virtual.boothprint.co.uk in the Points To box - IONIS
Hostname field – enter virtual to use virtual.mydomain.com (or your chosen alternative)
Point To field – enter virtual.boothprint.co.uk - NameCheap
Step 6 – enter virtual in the Host box to use virtual.mydomain.com (or your chosen alternative)
Step 6 – enter virtual.boothprint.co.uk in the Value box - HostGator
